Did you know that Zoho Sign lets you send one document to multiple recipients at once, making signature collection faster and easier?
Collecting signatures quickly and securely is essential for keeping business processes moving. The Send for Signatures feature in Zoho Sign makes this easy by letting you upload documents and request signatures from one or multiple recipients in a single step. This not only speeds up approvals but also maintains accuracy and compliance across your documents. This guide will show you how to use Send for Signatures so you can simplify your signing process and keep your operations on track.
Step-by-Step Instructions:
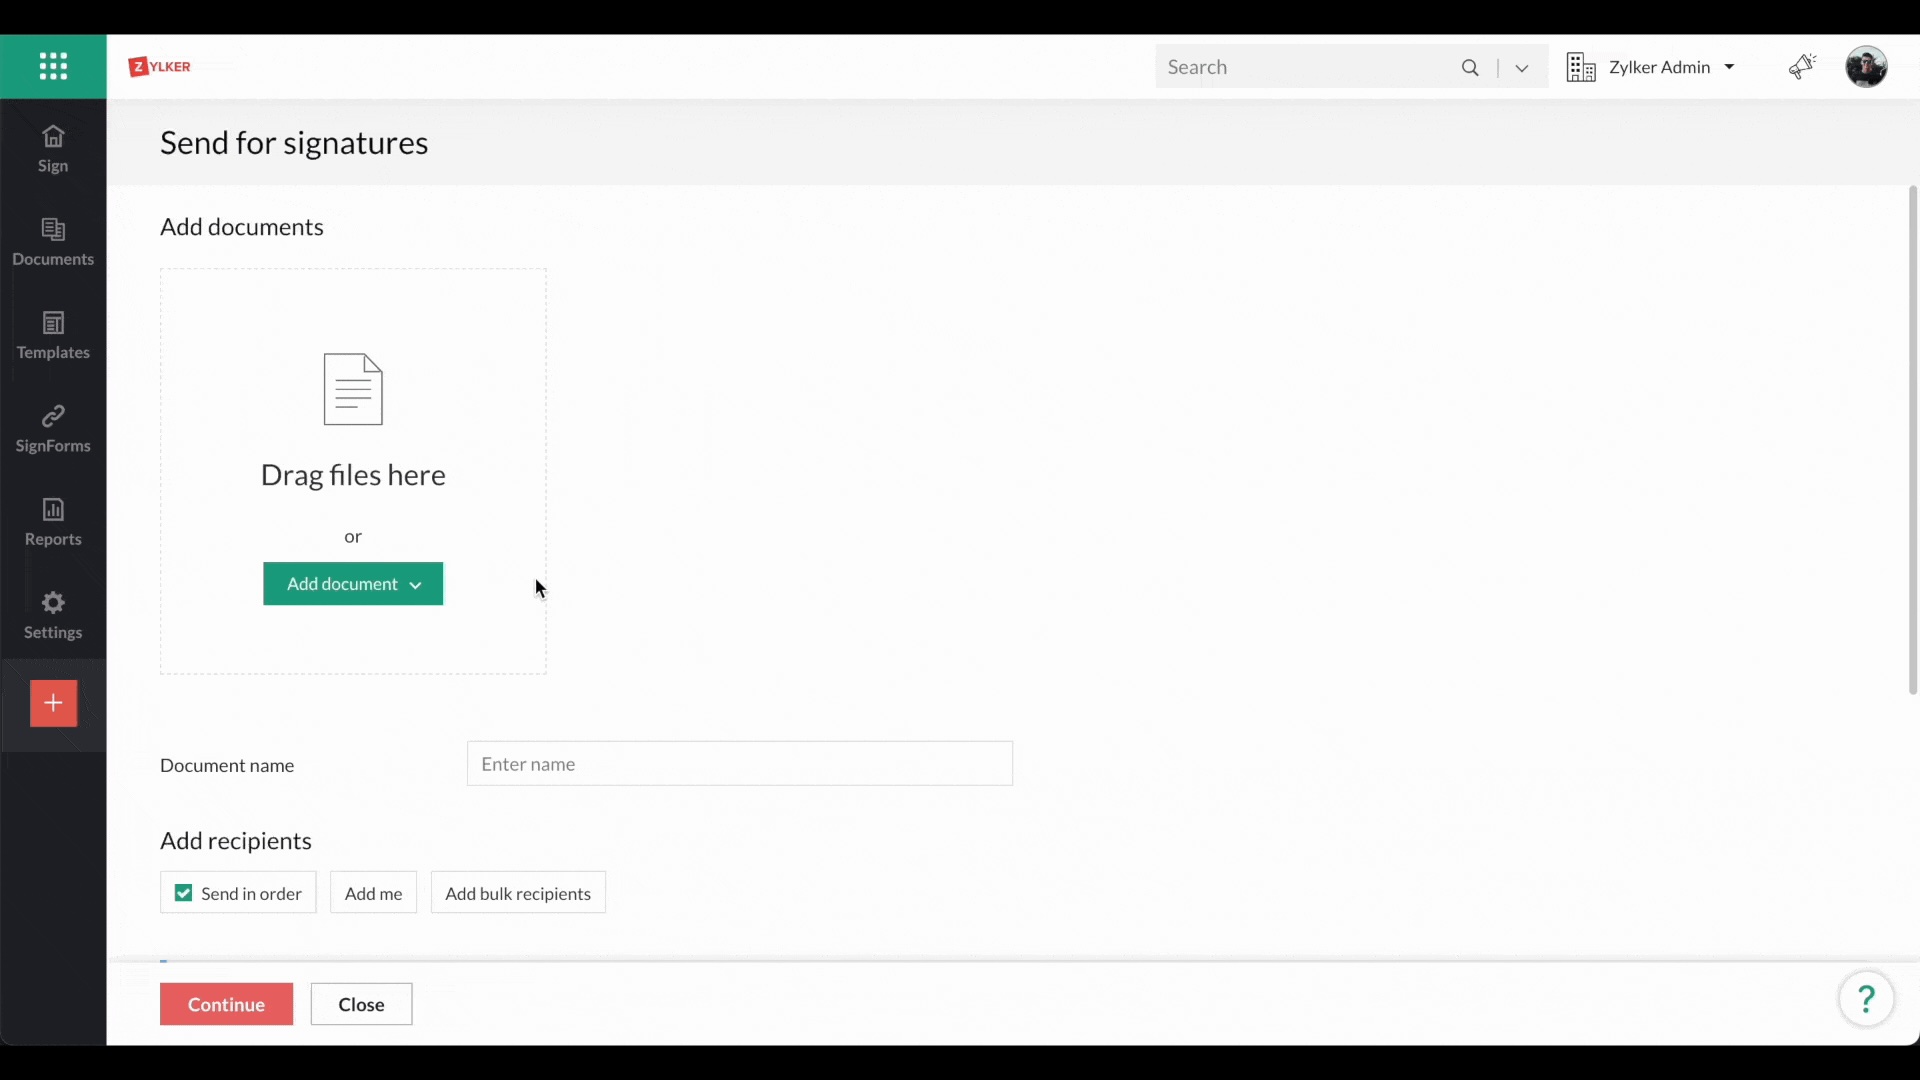
Sign in to your Zoho Sign account and, from the dashboard, select “Send for Signatures.

Sending documents for signatures is straightforward and can be done in five main steps:
- Upload documents
- Enter document details
- Add recipient details
- Add document fields
- Send documents
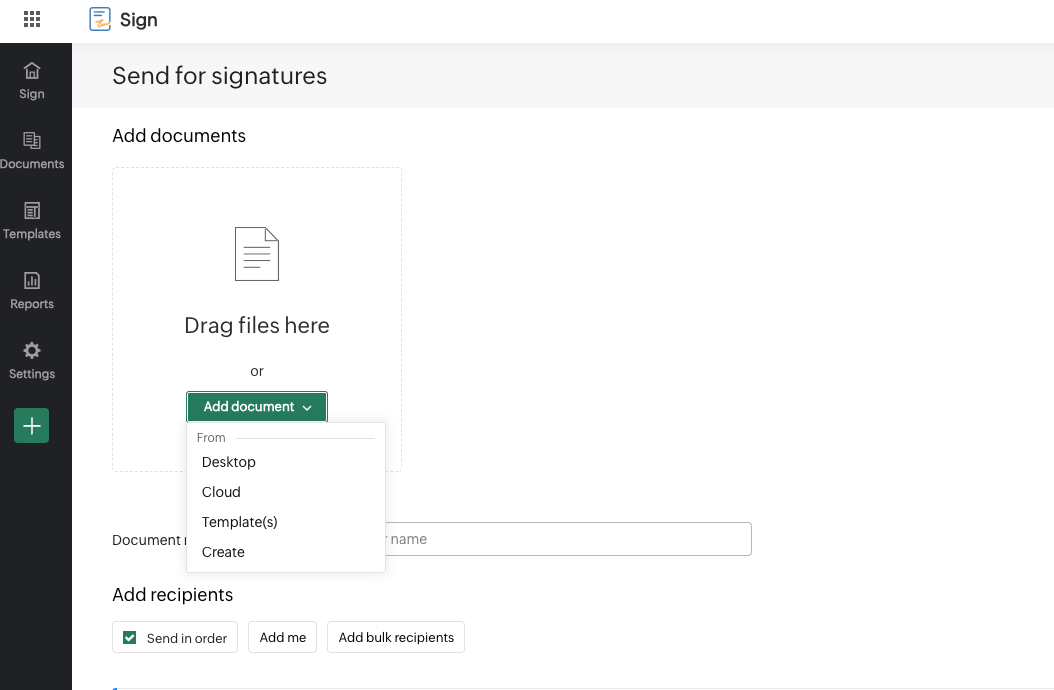
1. Upload Documents
The first step is to add the files you want signed. Zoho Sign gives you several ways to do this:
- Drag and drop the files straight into the “Send for Signatures” section in your browser.
- Upload from your device by clicking “Upload” and selecting the files from your folders.
- Import from cloud storage like Zoho WorkDrive, Zoho Docs, Dropbox, Box, Google Drive, or OneDrive. Click “Import” to open the picker, choose your cloud app on the left, find the files, and click “Attach” to bring them in.
- Use saved templates from your Zoho Sign account. Select “Use Template(s)” from the Add Document menu to pull in one or more templates, combine them if needed, and send them as a single signature request.
Merge and Send
If you need to combine multiple files before sending them out for signatures, Zoho Sign lets you merge them in just a few clicks:
- Select the documents you want to combine.
- Click “Merge Documents.”
The files will be merged into a single document, ready to send for signatures.
Note:
You can upload up to 40 files per signature request.
Each file can be up to 25 MB, and the combined size of all files can’t exceed 40 MB.
Zoho Sign supports a range of formats, including PDF, JPG, JPEG, DOC, HTML, ODT, PNG, TXT, DOCX, RTF, HTM, XLS, XLSX, TEX, and SXW.
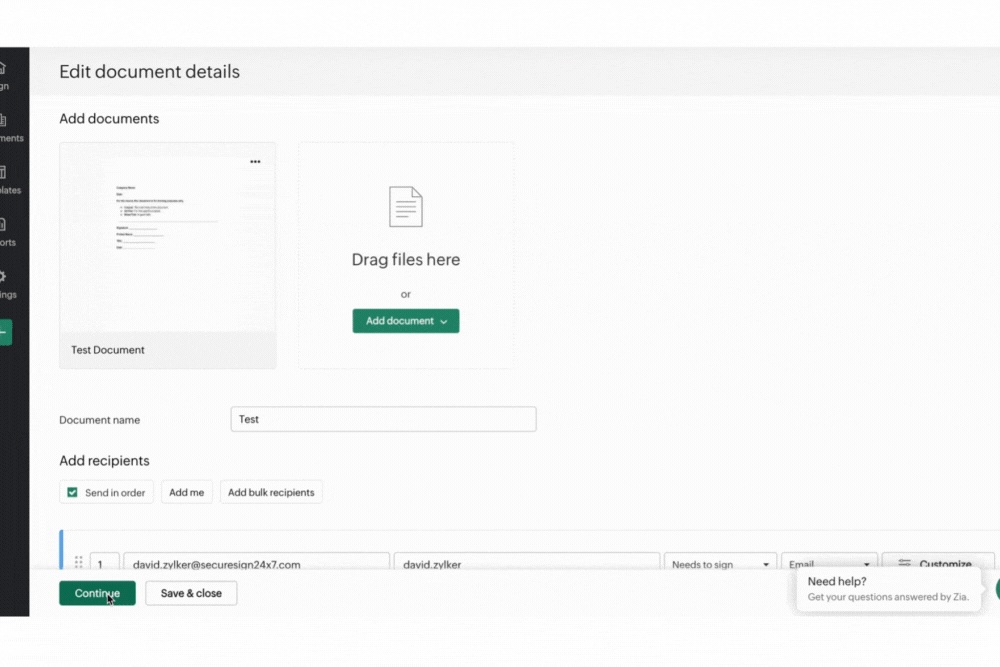
2. Enter Document Details
In this section, you’ll add information that helps you organize and manage your documents:
- Document Name: Give your document a name (up to 100 characters). You can include letters, numbers, and !@#$%&*(). If you leave this blank, Zoho Sign will use the uploaded file’s name by default.
- Days to Complete: Set how many days recipients have to sign. After this deadline, the document expires, and they won’t be able to access it.
- Document Validity Period: Choose whether the document stays valid indefinitely or set a specific expiration date from the dropdown menu.
- Document Type: Assign an existing type to categorize your document or create a new one by clicking the plus icon next to the field and entering a name.
- Folder: Organize your documents by adding them to an existing folder or create a new folder by clicking the plus icon and entering a name.
- Description: Write a brief description or include any extra details about the document.

3. Add Recipient Details
In this section, you’ll add the people who need to sign or receive the document. Recipients can be signatories, approvers, or anyone who should get a signed copy.
Adding Recipients
- Enter each recipient’s name and email address in the Add Recipients section.
- Click the + Add Recipient icon to include more people (up to 25 recipients).
- Click Add Me if you also need to sign the document.
- You can also send the same document to a bulk list of individuals for signatures.
- To remove someone, click the minus icon next to their name.
Recipient Roles
Choose what each person needs to do with the document:
- Needs to Sign – They fill in fields and sign.
- In-Person Signer – A host from your organization collects their signature face-to-face.
- Signs with Witness – Add a witness for documents that require one.
- Receives a Copy – They only get a signed copy.
- Manages Recipient – Allows them to review, edit, or add recipient details in the workflow.
- Approver – They review and approve rather than sign.
Delivery
- Document Delivery Mode – Send documents by SMS as well as email.
- Signing Order – Check “Send in Order” to have recipients act on the document sequentially.
Customization
- Private Note – Attach a personal note for each recipient.
- Authentication Code – Add an extra layer of security by sending a verification code.
- Email and Interface Language – Choose the language for the recipient’s email and signing interface (document content stays the same).
Reminders and Notes
- Automatic Reminders – Click More Settings, toggle Automatic Reminders on, and set how often they’re sent.
- Recipient Note – Add a general message for all recipients under “Note to All Recipients.”
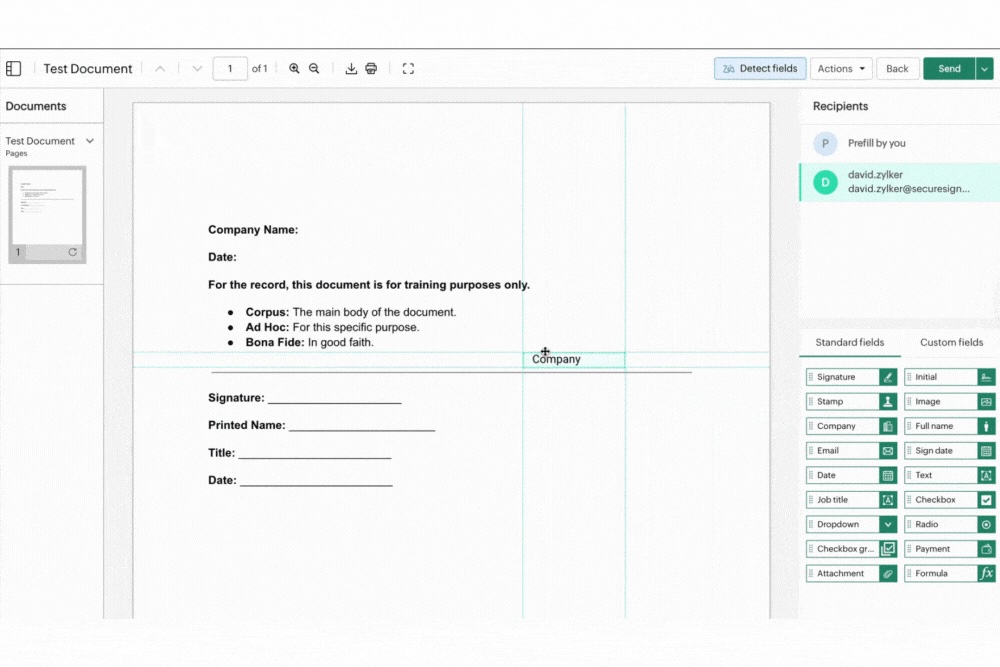
4. Add Document Fields
After uploading your files and adding recipients, you can place the fields that need to be filled out or signed.
- In the document viewer, you’ll see your uploaded documents listed on the left, the active document in the center, recipients at the top right, and available field options at the bottom right.
- Choose a document from the left pane and drag the required fields from the bottom-right pane onto the document to position them where needed.
- If there are multiple recipients, select each one at the top right and repeat the process for their fields.
Tips for Custom Fields
- For custom text fields, you can set input validation by choosing a data format from the Validation dropdown or adding a custom regex.
- All fields include a “Data Label” to map or identify data. If several fields should contain the same information, assign them the same data label. Once the signer fills the first field, the others will auto-fill.
- Fields sharing a data label also share properties like width, height, character limit, and validation. If you change one, Zoho Sign will prompt you to apply the change to all matching fields.
Using Saved Templates
If your signer fields are already stored in a template, you can import them. Open the Actions dropdown, click Apply Field Template, select the template, and click Yes to bring the fields onto your document.
Note
- You can format fonts and labels for all fields except Signature and Initial by double-clicking them.
- Fields can be resized by clicking and dragging their edges.
- Every recipient added as a signer must have at least one field assigned to them.
5. Send Documents
Once you’ve placed all the fields for each recipient, you’re ready to send the documents:
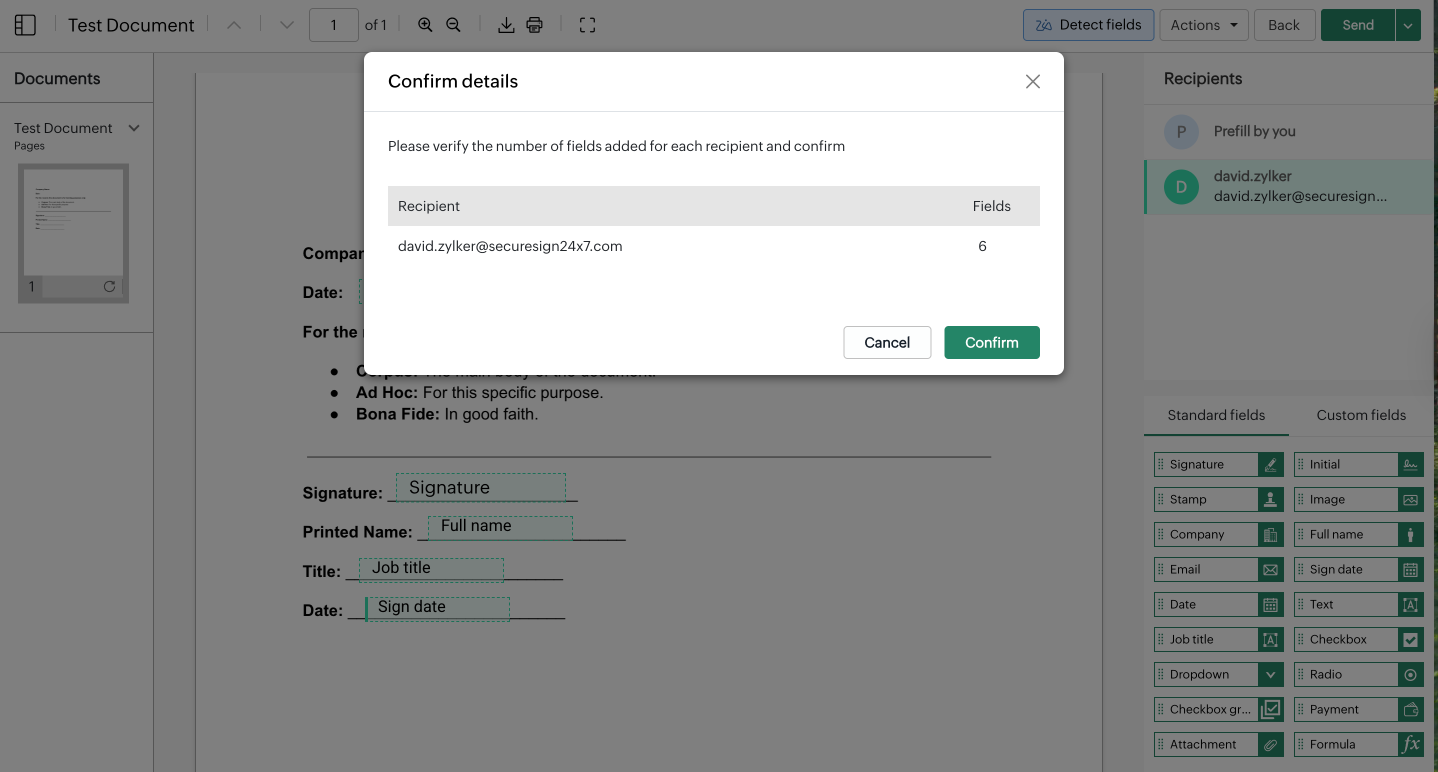
- Click Send to open the confirmation box.
- Review the details, then click Confirm to send the documents for signatures.
Note: If you’re sending from a trial account, a watermark will appear on the document.