Moe Outlou
Integrator Technician – Analyst
Did you know that by adding Dashboards, Custom Views, and Widgets to your Zoho CRM Home tab, you can create a personalized workspace that highlights the metrics and insights most relevant to your business?
Adding components like Dashboards, Custom Views, and Widgets to your Zoho CRM Home tab allows you to create a fully customized, data-rich workspace that centralizes essential information from various modules. Dashboards provide real-time visual insights, Custom Views give you access to specific data sets, and Widgets bring key metrics front and center. By organizing these elements in one place, you can streamline daily activities, monitor performance indicators, and ensure the most relevant information is always at your fingertips. This personalized setup boosts efficiency and keeps you focused on what matters most for your business.
Add Components in User’s Home Page
In the User’s Home Page, you can add components of your choice, displaying data from various modules such as Leads, Potentials, Dashboards, and more.
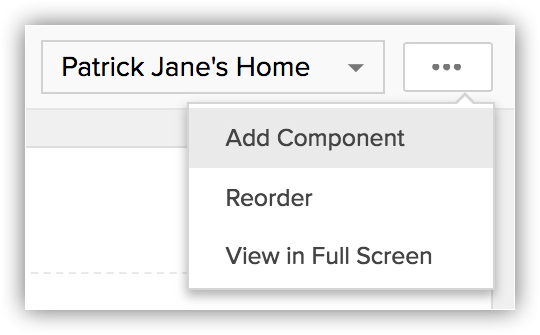
1. Select User’s Home from the drop-down menu in the top right corner in the Home tab.
2. Click More > Add Component.
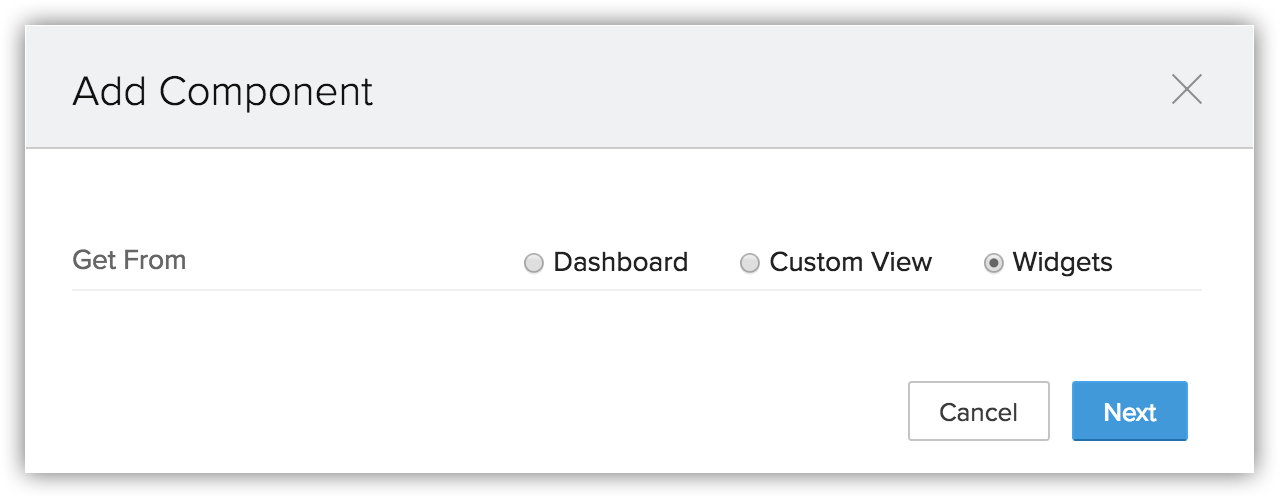
3. In the Add Component pop-up window, follow these steps:
Under Get from, choose one of the following options:
- Dashboard
- Custom View
- Widgets
Dashboards:
- Pick the Dashboard that contains the component you want to add.
- Enter the Component Name and click Save.
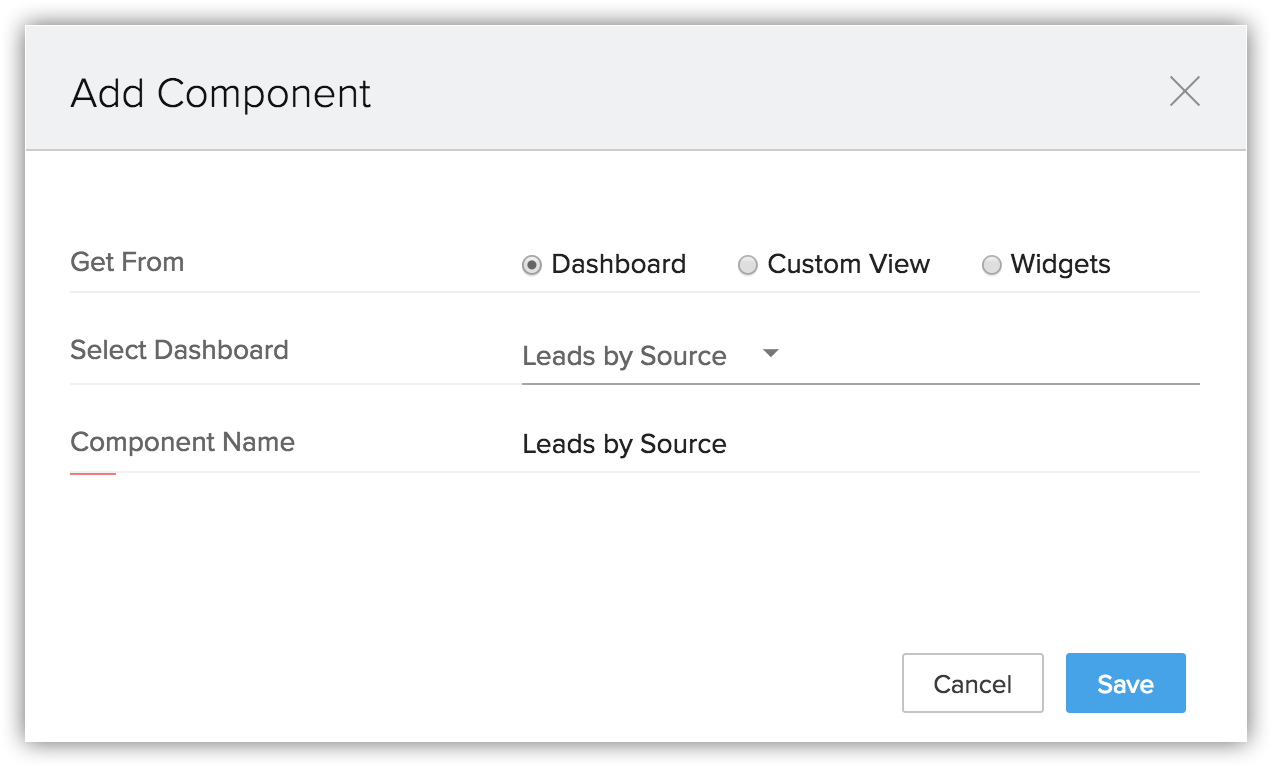
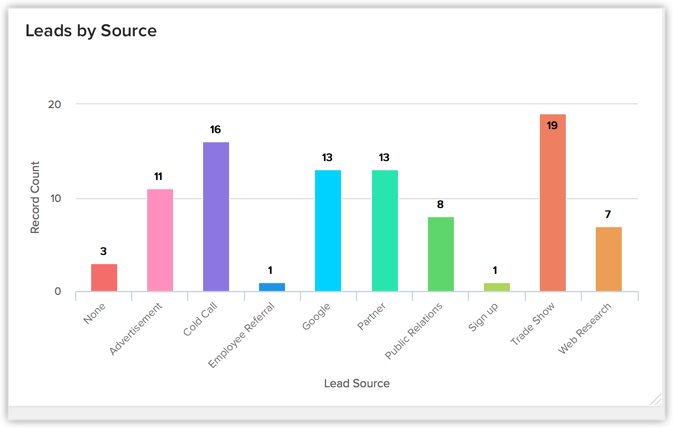
The chosen dashboard is now added as a component to your Home tab.
Custom View:
Select the module and the desired custom view. Enter the Component Name and click Save.
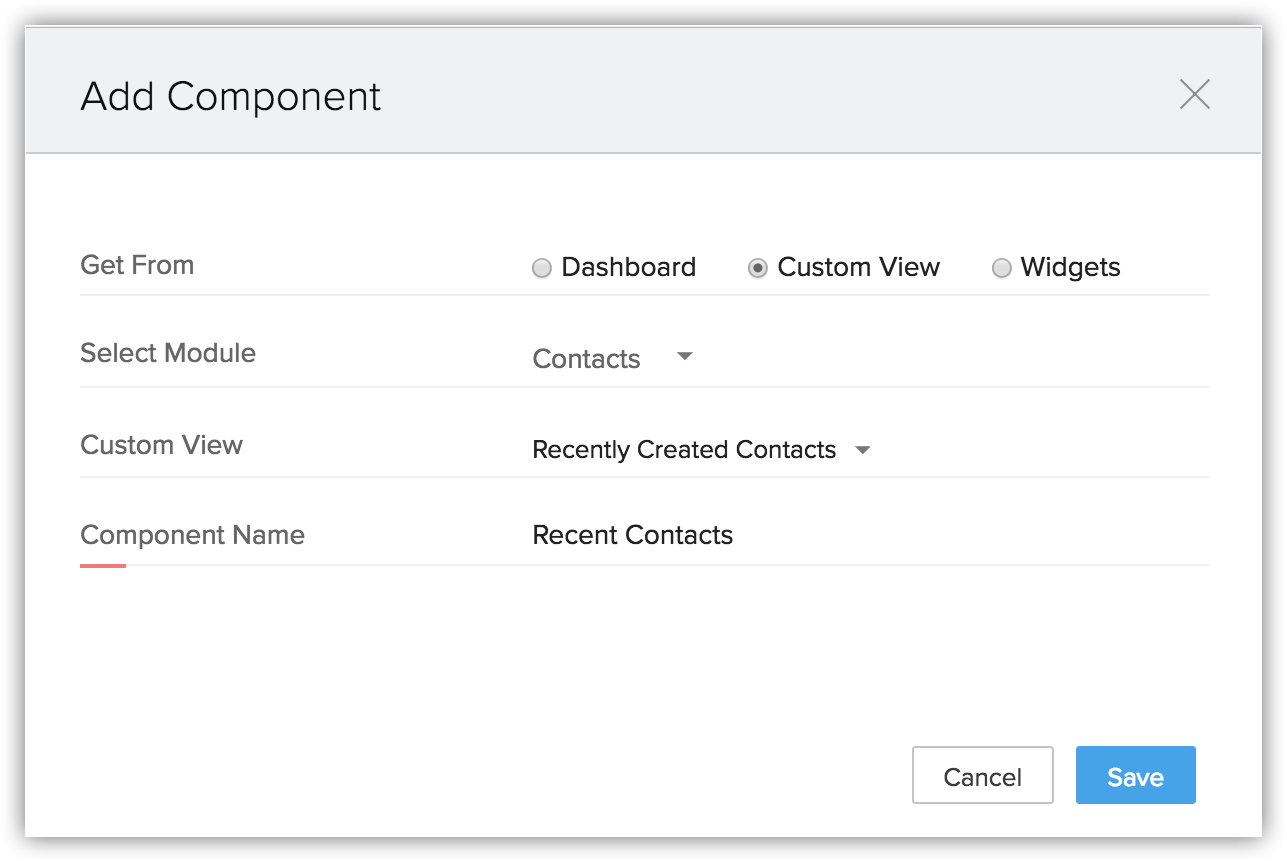
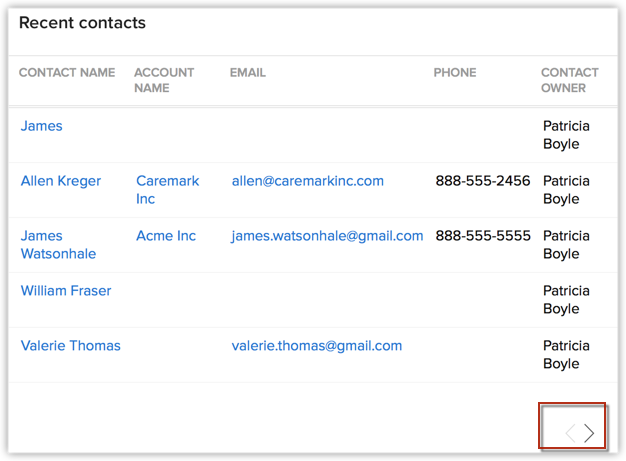
Once you’ve added your chosen custom view as a Component in the Home tab, you can move through additional pages using the navigation arrows. Each page will display up to five records.
Widgets
- In the Get from field, select Widgets and then click Next to continue.
- You have the option to add a widget from the list or, if you prefer, click +Create New Widget to design a custom one.
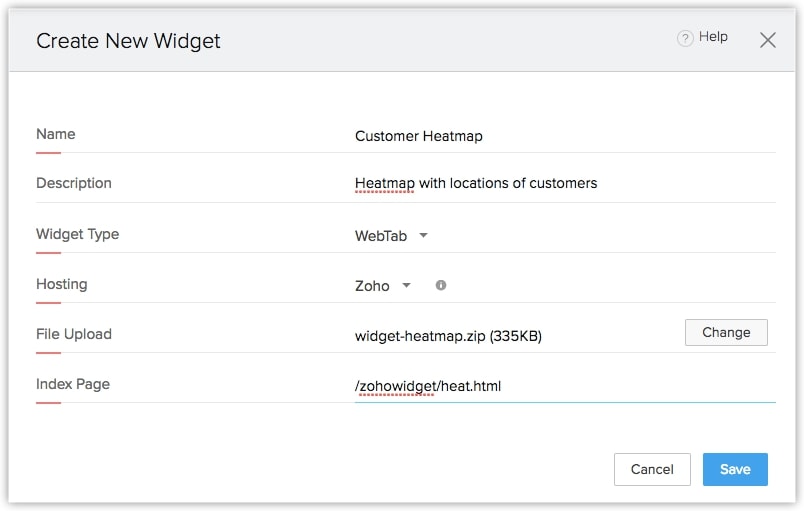
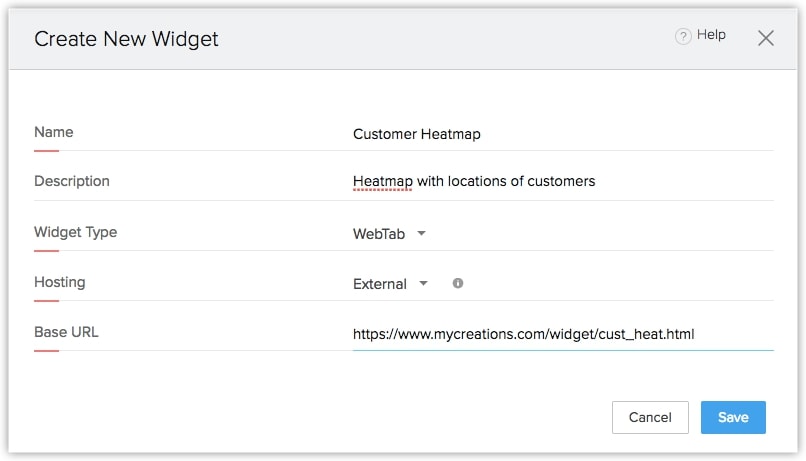
- On the “Create a New Widget” page, follow these steps:
- Enter the widget’s Name and Description, then select your preferred hosting type from the dropdown menu.
- To host internally:
-
- Choose Zoho as the hosting option from the dropdown.
- Upload your application file.
- Provide the URL of your application’s index page, then click Save.
- To host externally:
- Select External from the hosting dropdown menu.
- Enter the Base URL of your application and click Save to finalize.
Note:
Components can’t be customized in Classic View, but users can choose the number of records per page based on their Zoho CRM edition.
Each user can have up to 10 Home Pages: five linked to their role and five to their profile. If a role or profile isn’t available when sharing, it may already have five Home Pages.