
Did you know that Zoho Social lets you create customized performance reports and schedule them to be delivered automatically to your team?
Instead of manually gathering metrics from different social media platforms each month, businesses can organize key performance data in one place and share reports on a recurring schedule. This makes it easier to monitor results, identify trends, and keep stakeholders informed.
Tracking social media performance is key to understanding what content resonates with your audience. However, when businesses manage multiple social media channels, collecting engagement metrics, audience growth data, and other performance indicators can become a time-consuming task.
Zoho Social’s reporting features help simplify this process by allowing users to create custom reporting dashboards with metrics relevant to their business goals. Reports can also be scheduled for automatic email delivery, giving teams regular access to performance data without having to prepare each report manually.
Here’s how to create and schedule a social media performance report in Zoho Social.
Step-by-Step Instructions:
Step 1: Open the Reports Section
- Log in to Zoho Social.
- Select the appropriate brand.
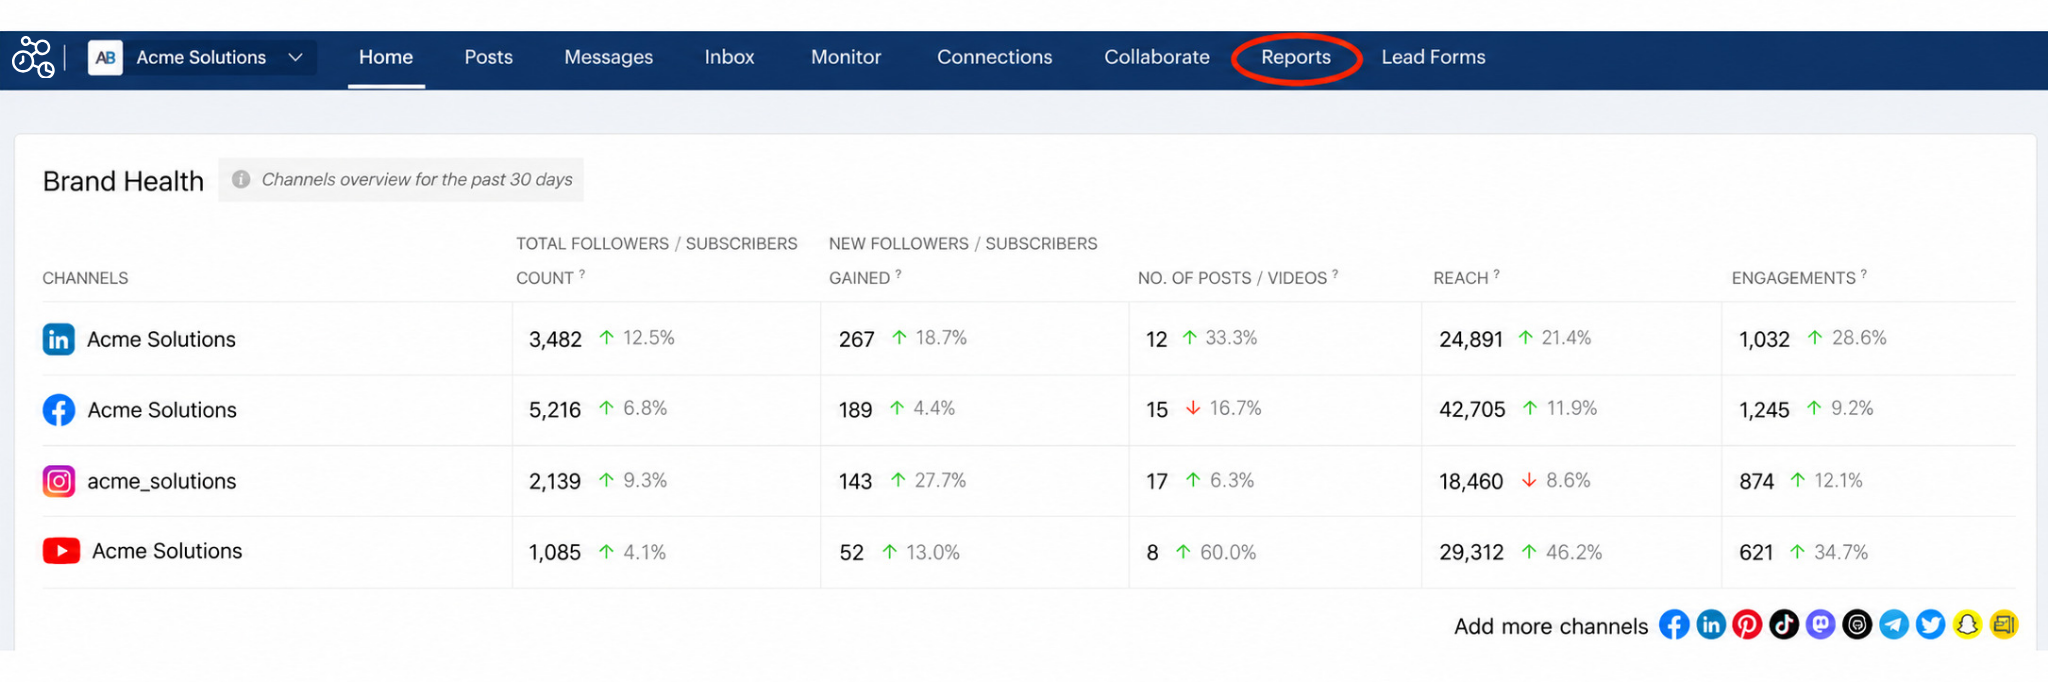
- Click Reports in the top navigation menu.
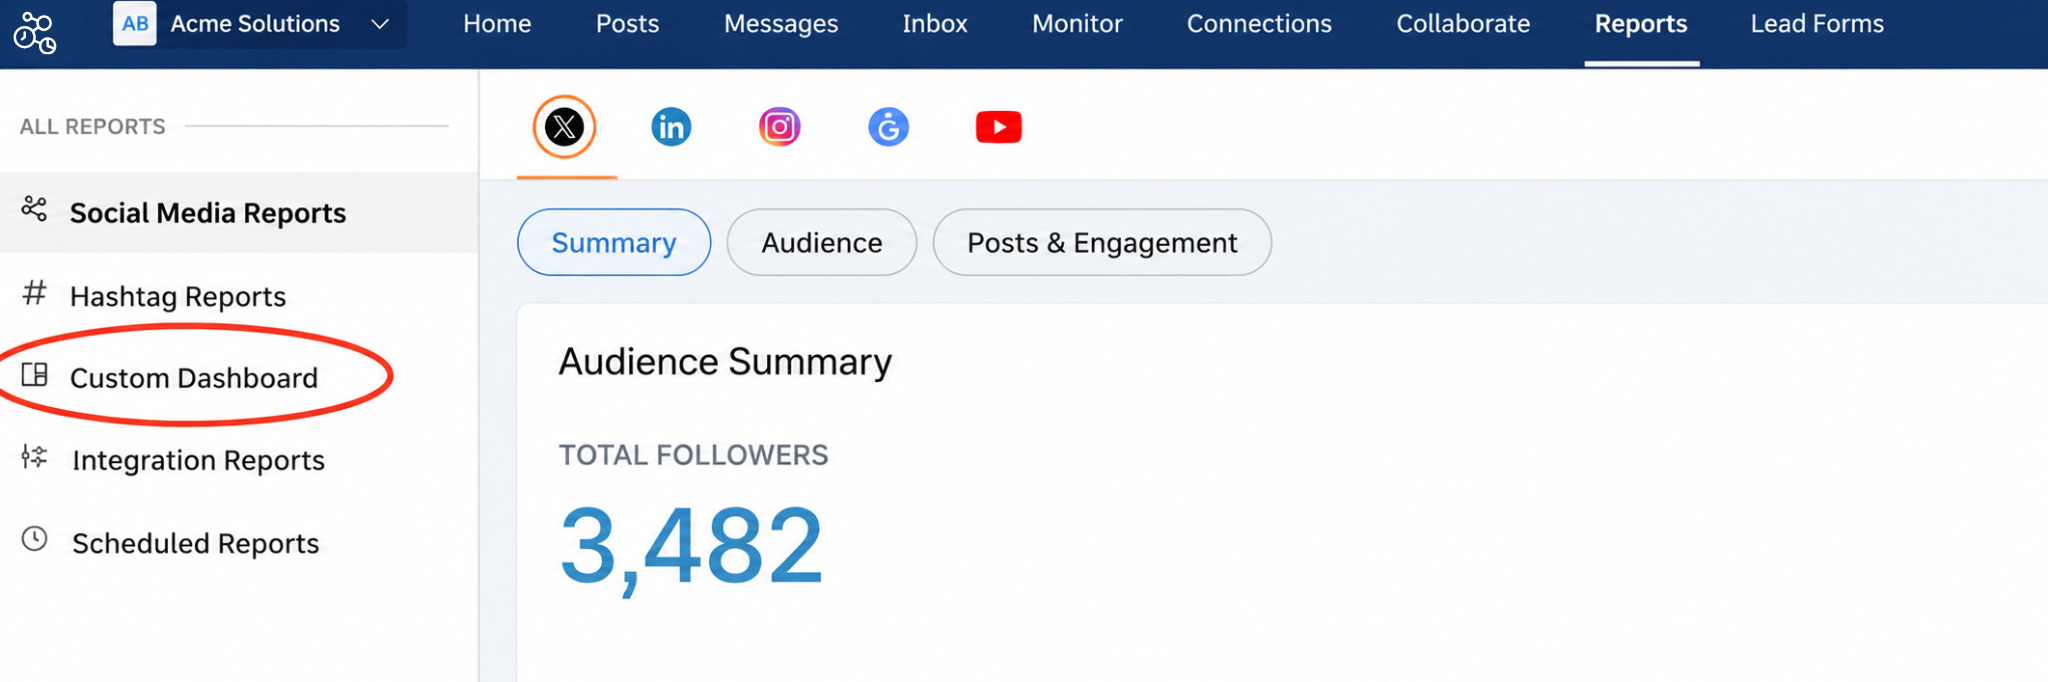
- Select Custom Dashboard from the left-hand menu.
Step 2: Create a Custom Reporting Dashboard
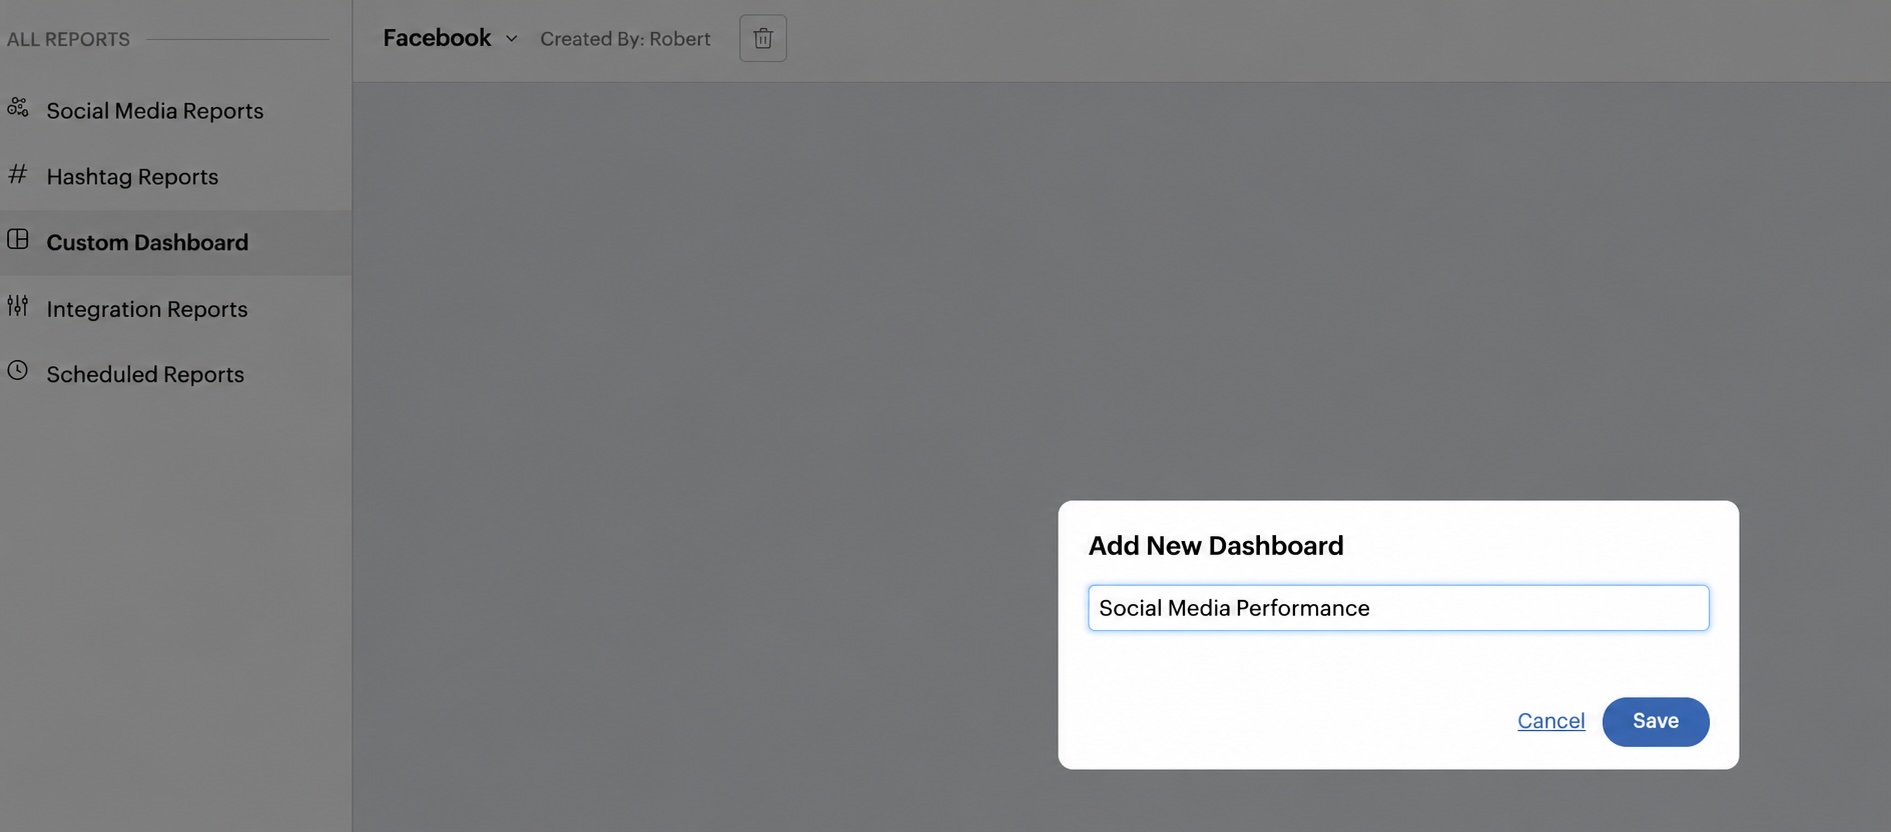
- Select the option to create a new custom dashboard.
- Enter a name that clearly identifies the report, such as “Social Media Performance.”
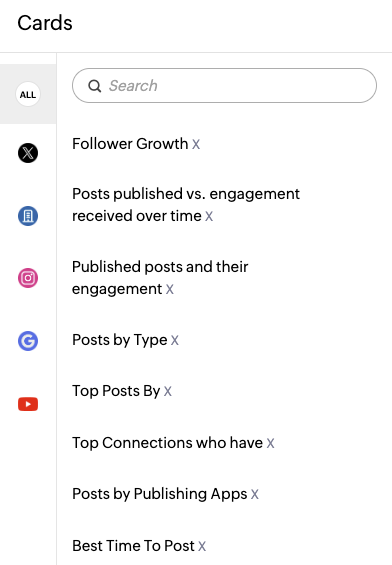
- Add reporting cards for the metrics you want to monitor.
- Save your dashboard.
Step 3: Select Your Performance Metrics
Customize your dashboard by including relevant metrics, such as:
- Audience growth and follower trends.
- Post engagement and interactions.
- Reach and impressions.
- Content performance across supported social media channels.
Available metrics vary by connected social media platform.
Step 4: Schedule Your Report
- Open your custom dashboard.
- Click the three-dot menu (•••) next to the date range in the upper-right corner.
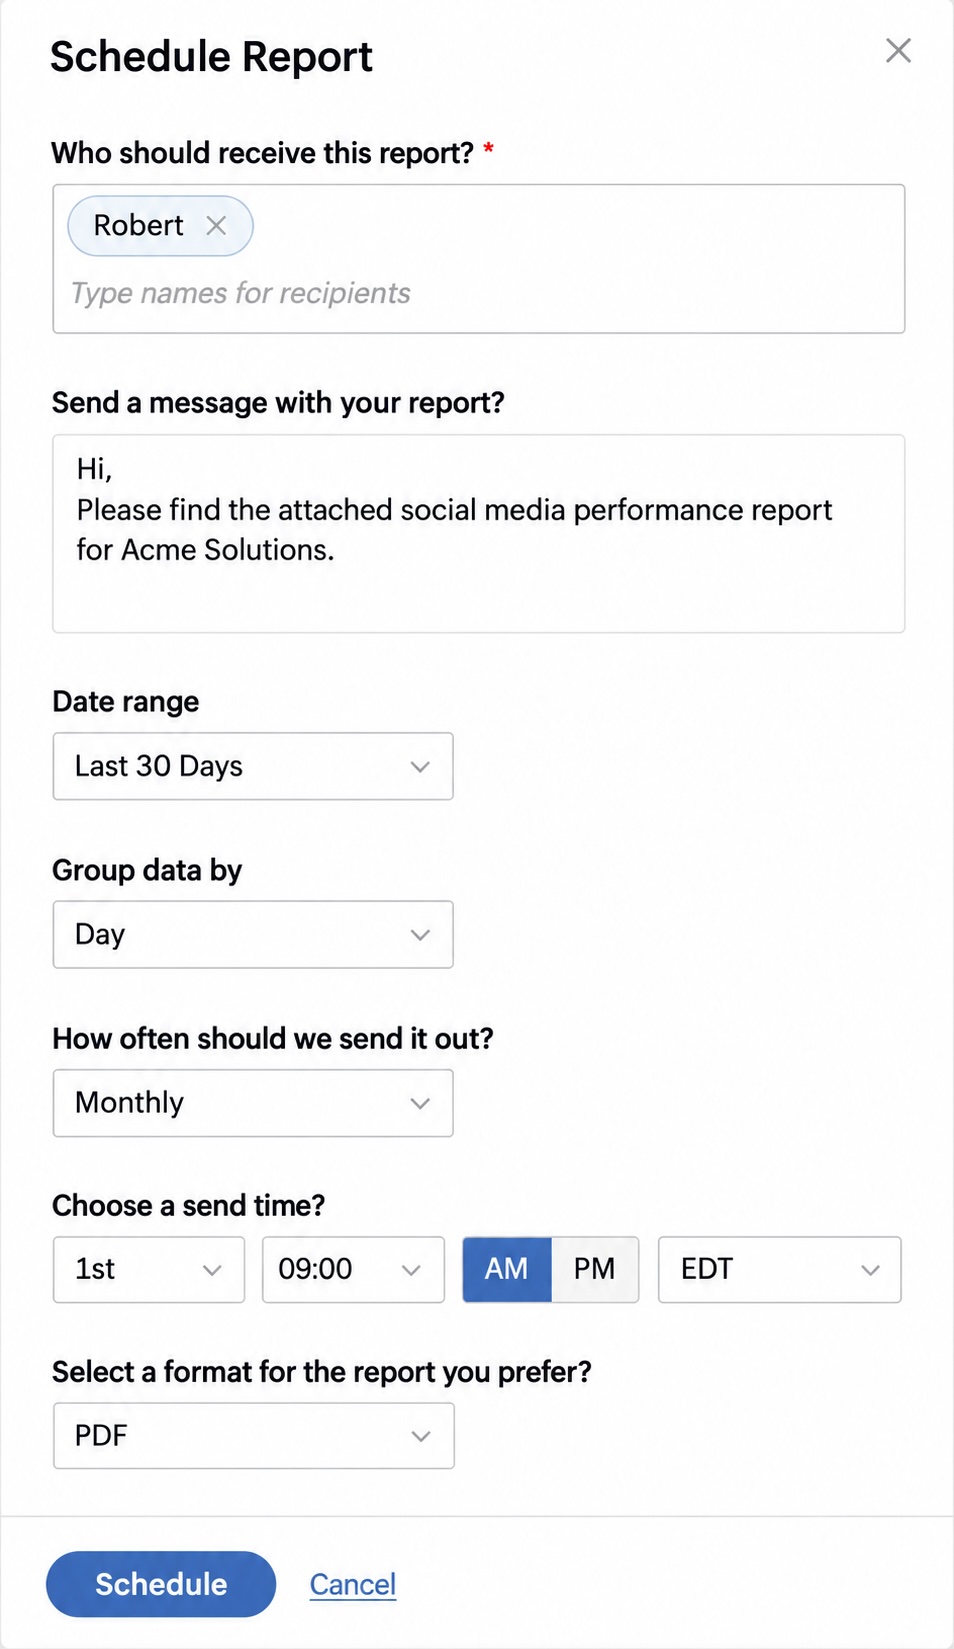
- Select Schedule.
- Under Who should receive this report?, select the recipients.
- Add an optional message to accompany the report.
- Choose the reporting period and delivery frequency.
- Select the available export format, such as PDF or PNG.
- Confirm the schedule.
Step 5: Manage Scheduled Reports
- Navigate to Reports.
- Check the configured recipients and delivery schedule.
- Update the report or scheduling settings when your reporting needs change.
The Takeaway:
With Zoho Social, businesses can spend less time compiling performance reports and more time understanding what their social media results mean. Custom dashboards and scheduled reporting help teams maintain visibility into their performance and make more informed content decisions.


