Did you know that automating your Zoho apps with Zoho Flow can save hours each week by reducing manual updates and keeping your data perfectly aligned across your systems?
Efficiently connecting your business apps is essential for smooth operations, especially when customer data, updates, and daily activities move across multiple systems. Zoho Flow makes this easier by letting you trigger actions directly from Zoho CRM events and pass information to other Zoho services in a single automated path. This helps you reduce manual updates, eliminate repetitive tasks, and maintain consistent data across your entire ecosystem. In this guide, you will learn how to set up triggers, define actions, and build automations that keep your operations connected and running smoothly.
Step-by-Step Instructions:
Step 1: Create a new Flow
- Go to Zoho Flow.
- In the left menu, click My Flows if you are not already there.
- Click + Create or Create flow (button at the top right).

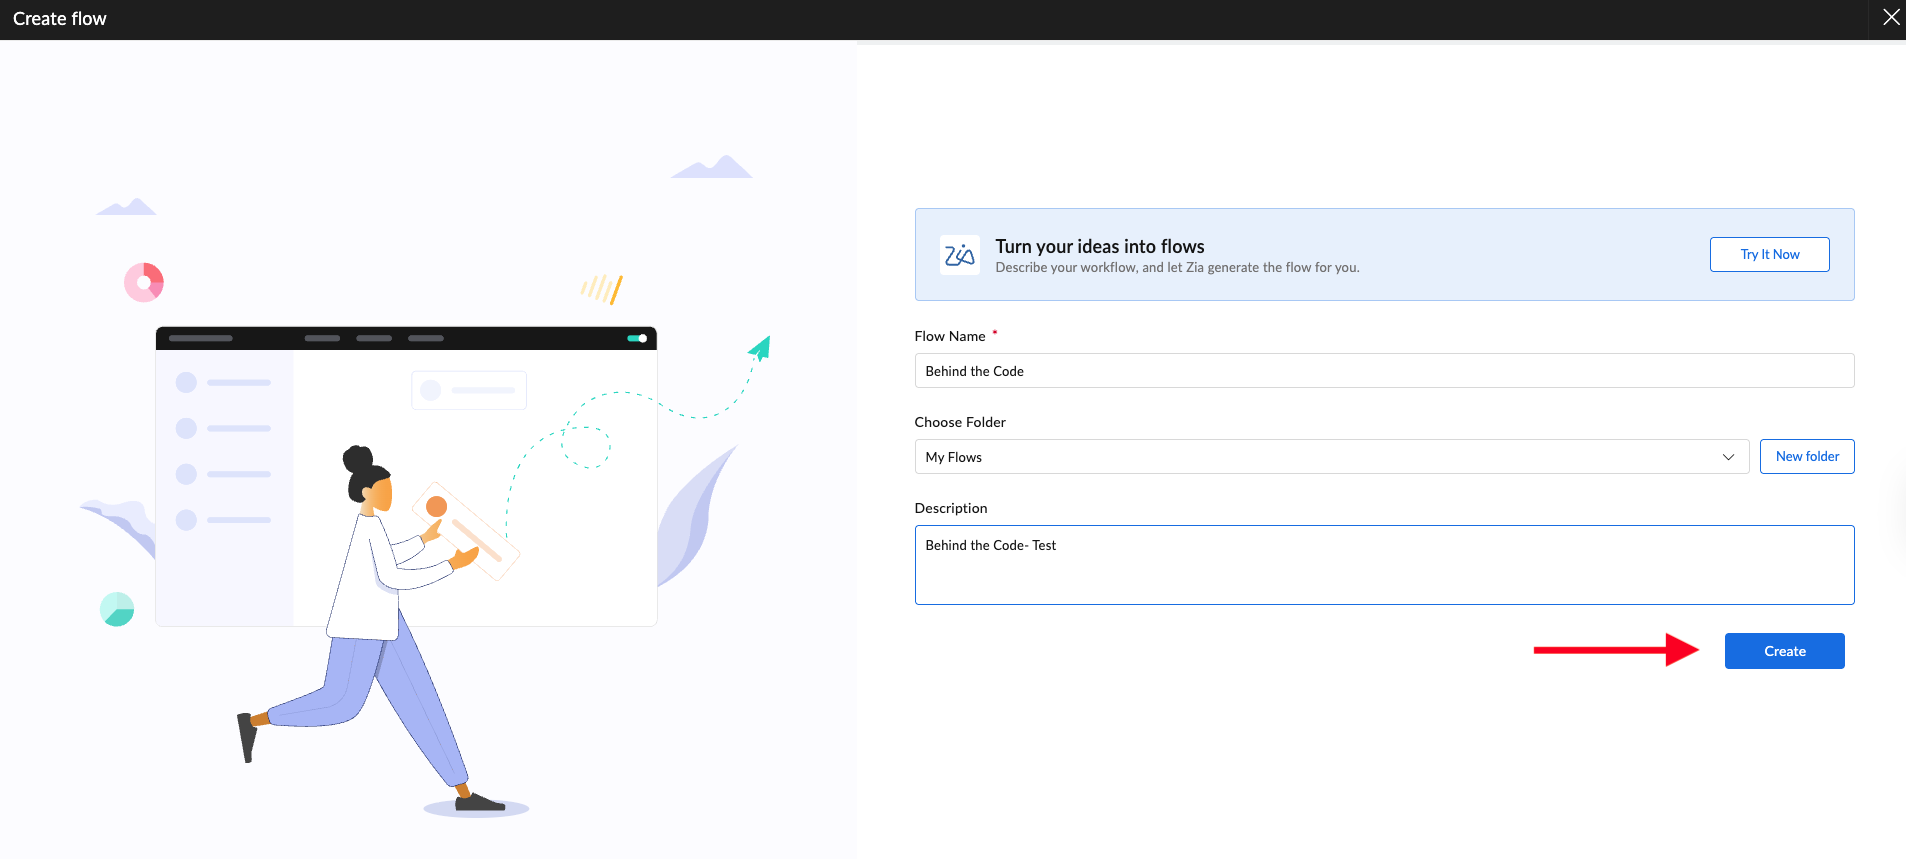
- In the pop-up:
- Enter a Flow name.
- Optionally add a Description so your team knows what this Flow does.
- Click Create.
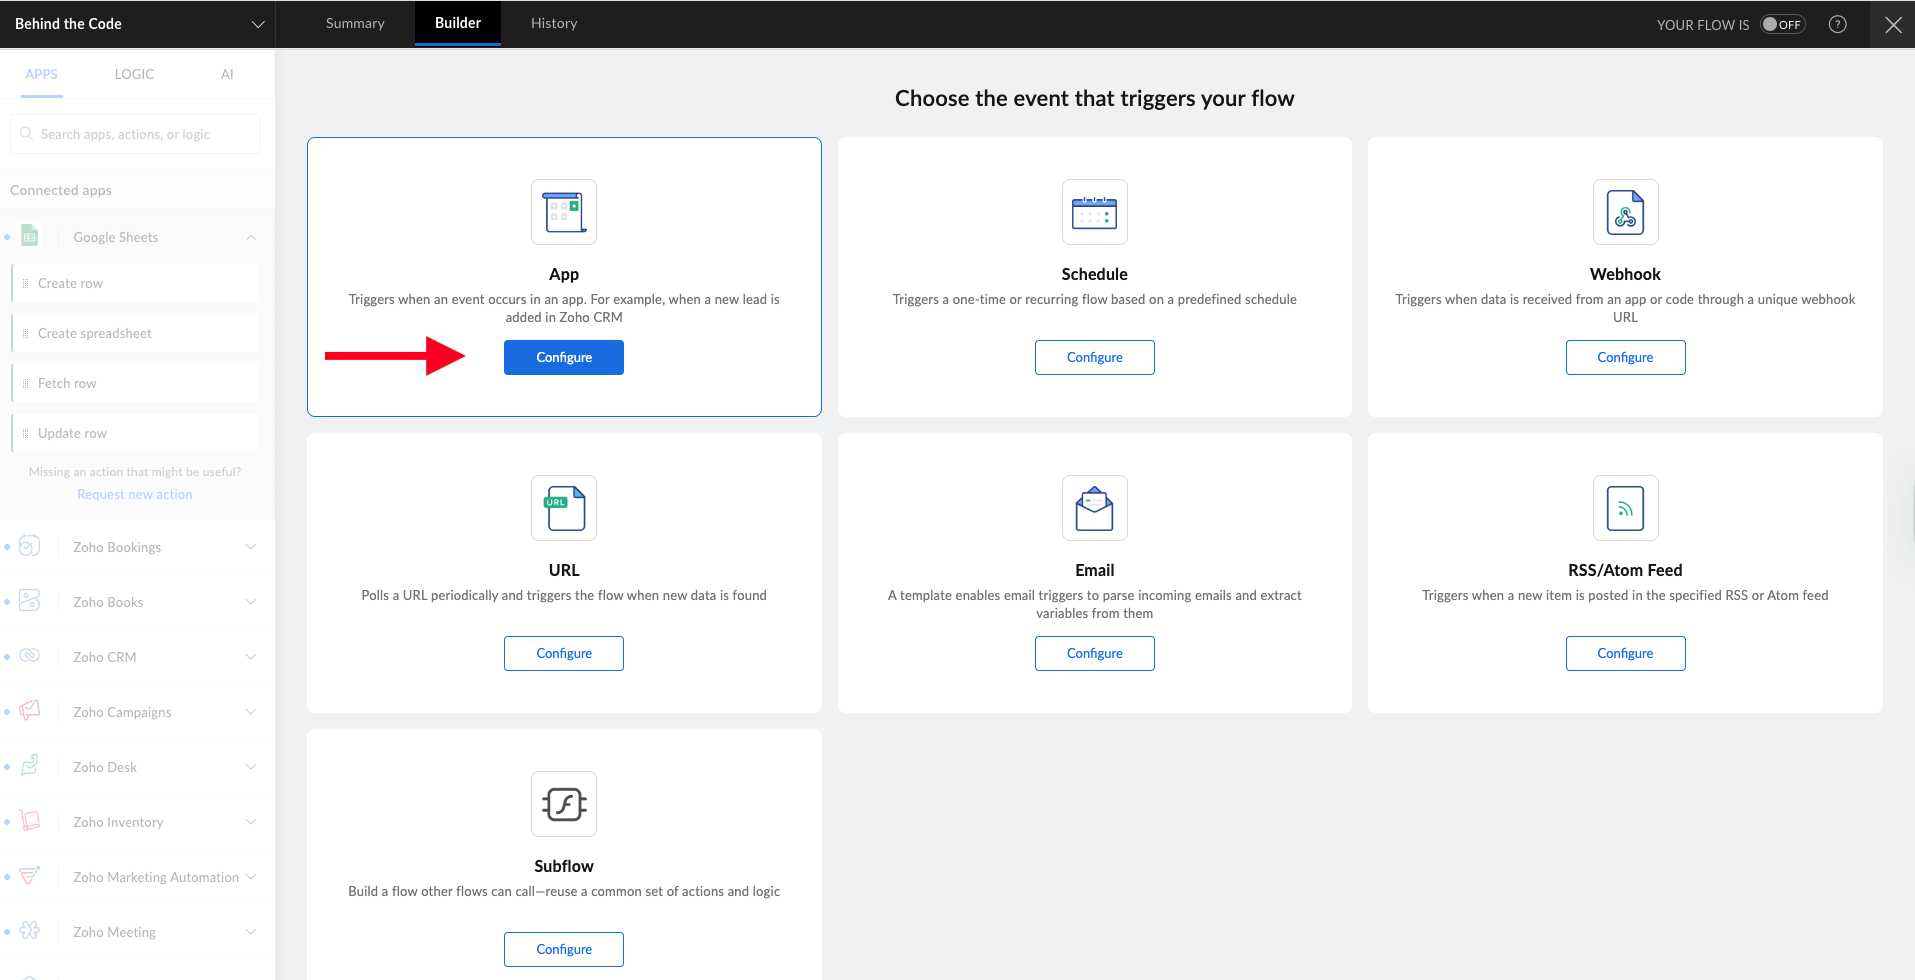
You will land on the builder canvas with an App trigger box at the top.
Step 2: Configure Zoho CRM as the trigger app
- In the canvas, you should see an App trigger block with a Configure button.
- Click Configure.
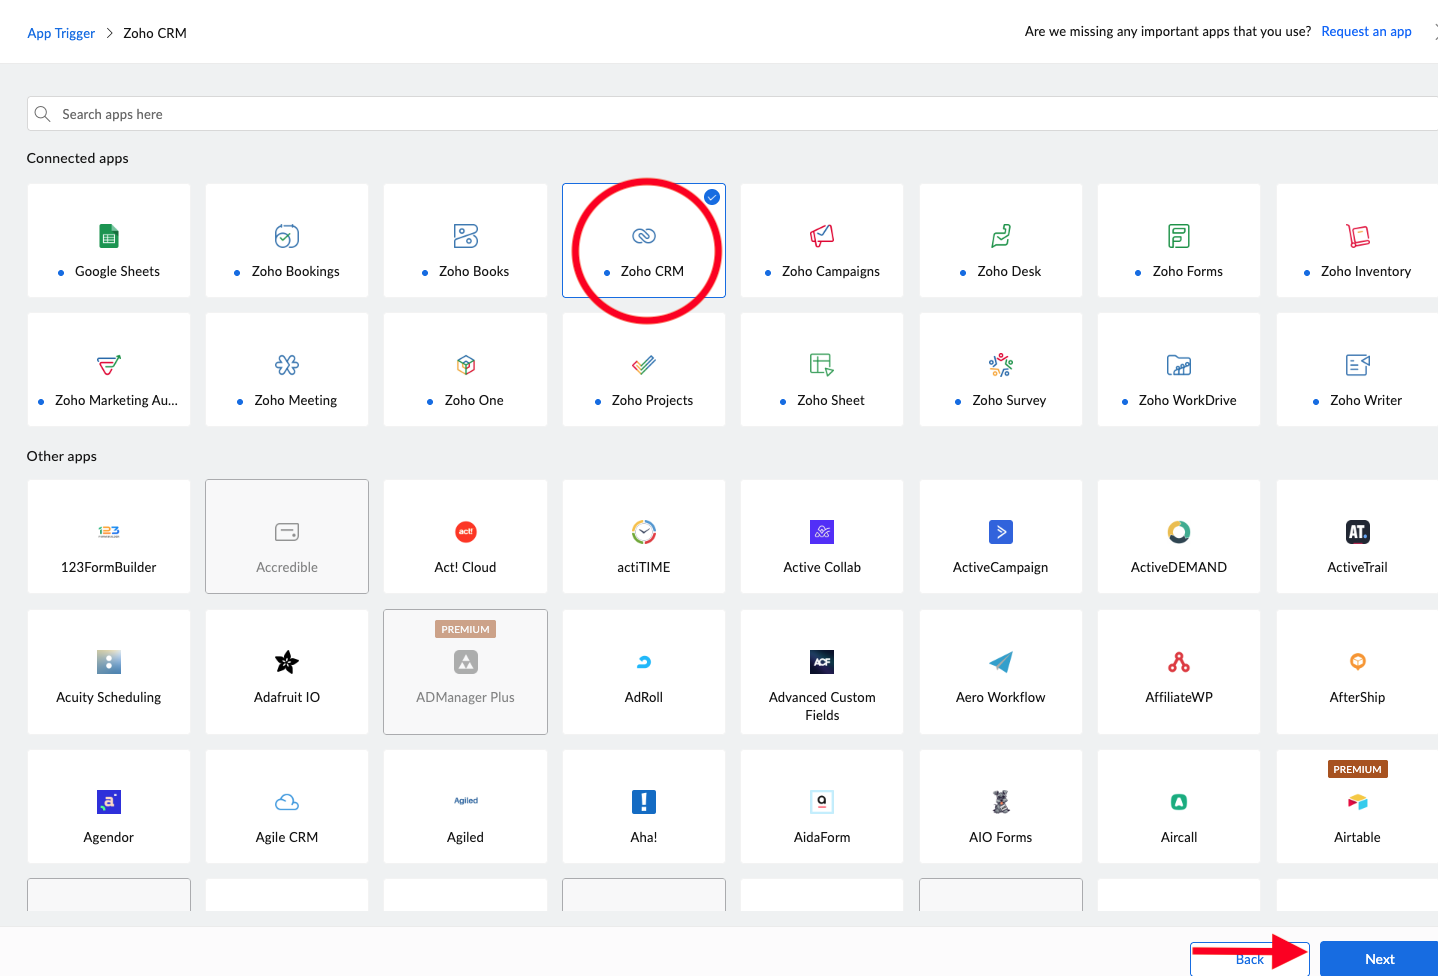
- A panel opens that lists available apps. Search for Zoho CRM in the search bar.
- Click Zoho CRM, then click Next.7B
Step 3: Choose the Zoho CRM trigger event
Note:
There will be a list of options, such as:
- New module entry
- Triggers when a new record is created in the selected module (Leads, Contacts, Deals, etc.).
- Updated module entry
- Triggers when an existing record is updated.
- New lead, New contact, New note, etc.
- Some modules have their own specific events.
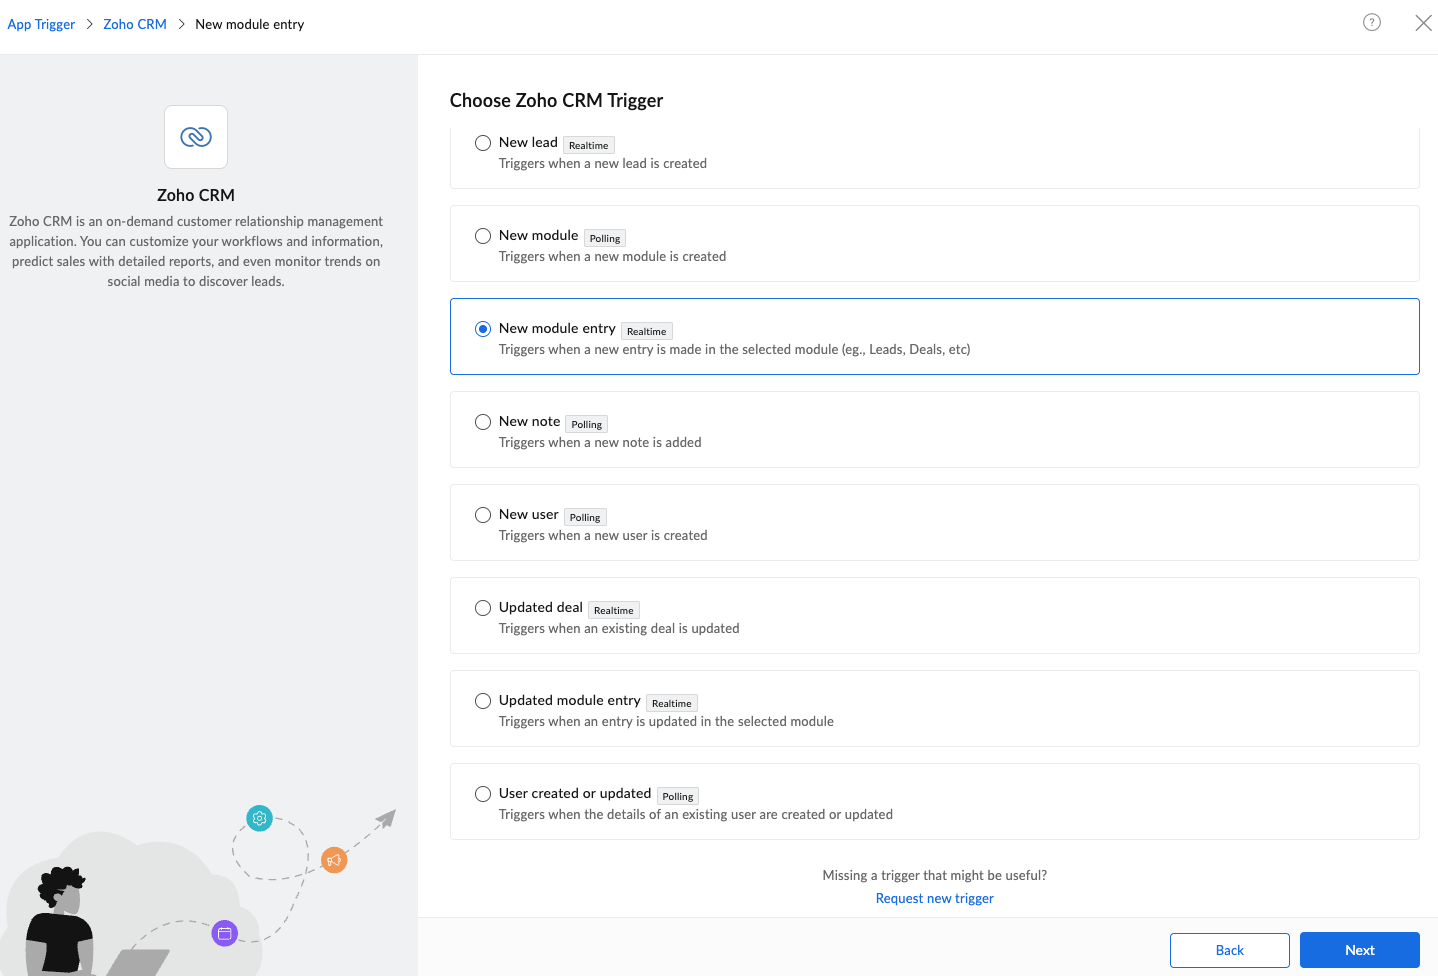
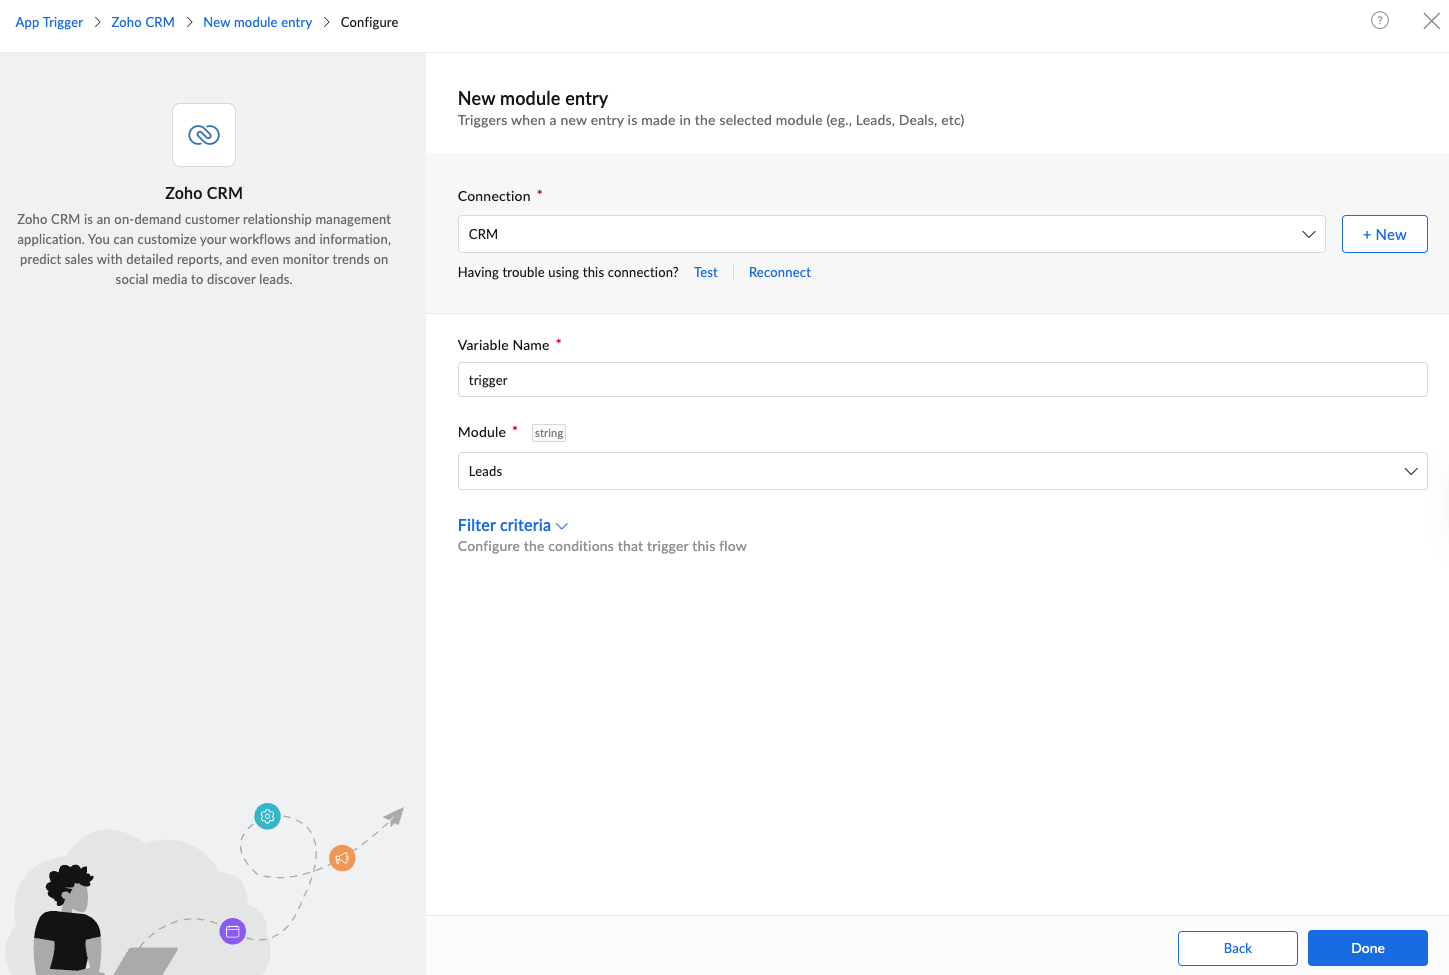
Select the Zoho CRM Trigger.
- Under Connection, keep the CRM connection selected.
- Under Variable Name, leave the default value.
- Under Module, choose Leads.
- Click Done.
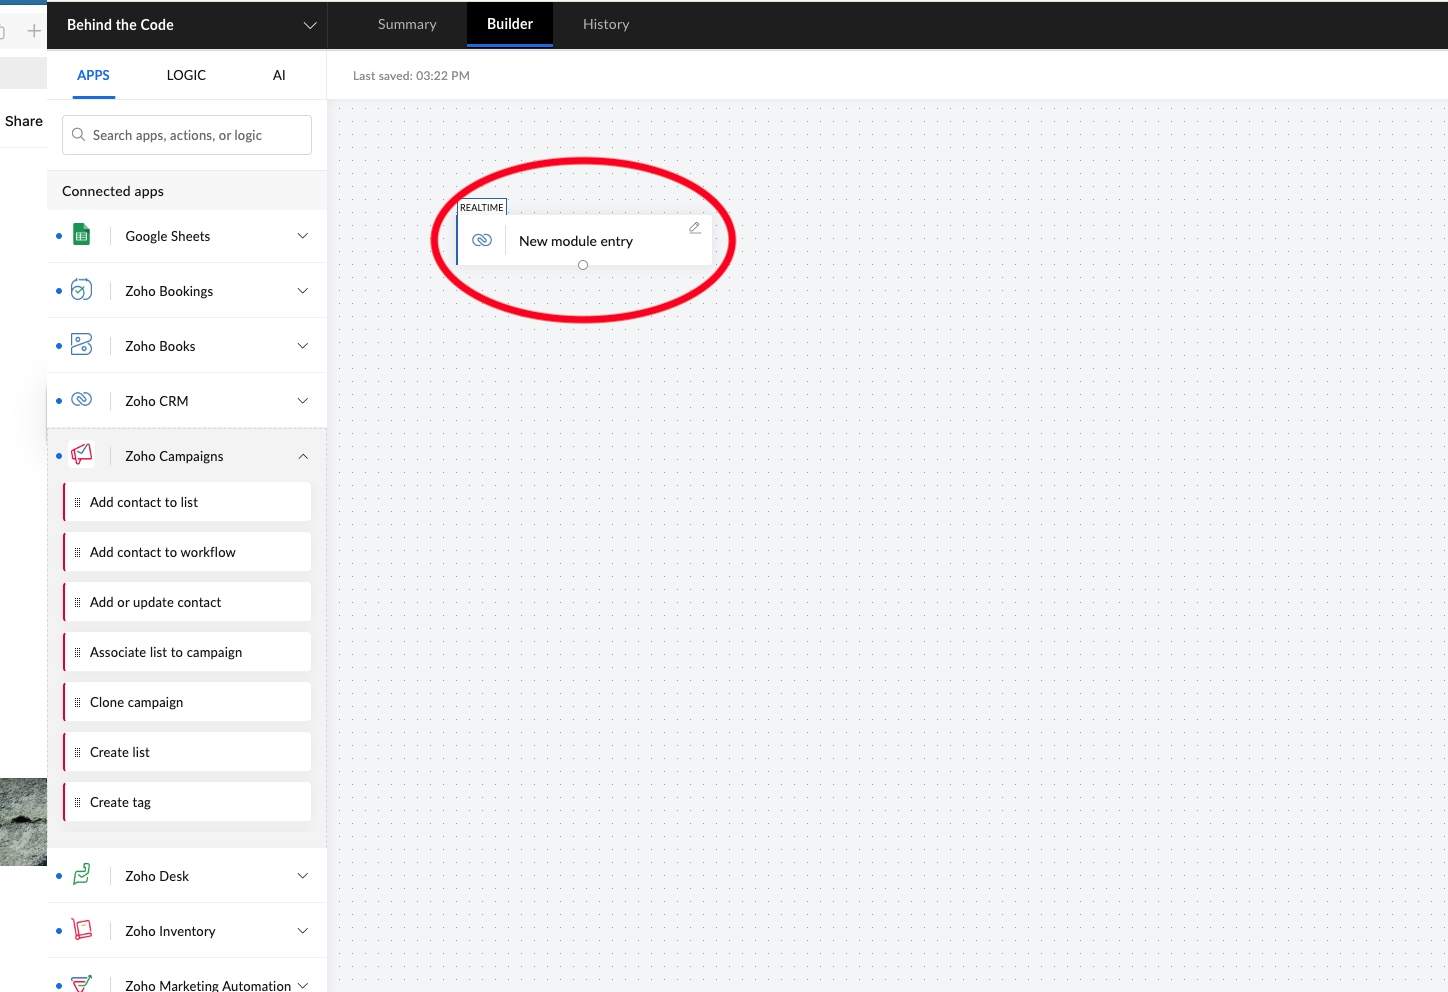
- You will now see a block on the canvas labeled “New module entry (Zoho CRM).” This confirms that your trigger has been successfully created and is ready for the next action.
Step 4: Add an Action from the Sidebar
Zoho Flow interface with the sidebar-only method:
- Look to the left sidebar labeled Apps.
- Scroll to find Zoho Campaigns.
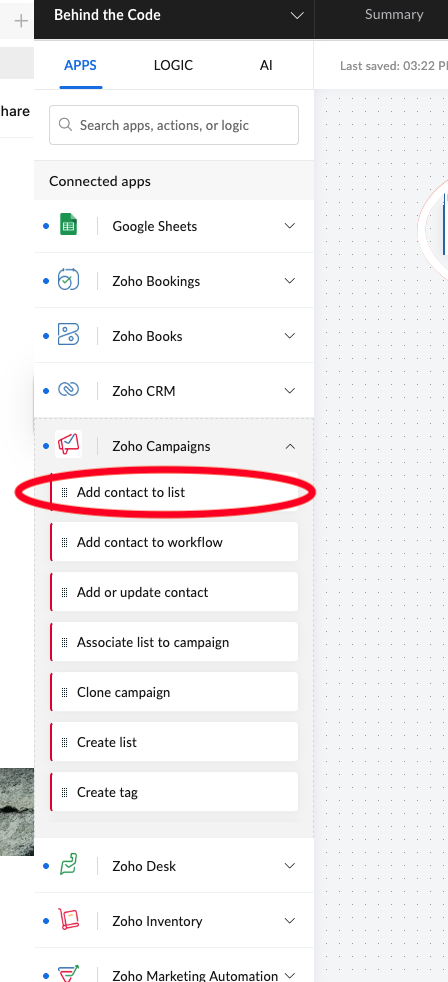
- Click the arrow beside Zoho Campaigns to expand it.
- Choose Add contact to list.
- Move the action block under your trigger and drop it into place. The action panel will then open on the right side of the screen.
Step 5: Configure the Zoho Campaigns Action
In the panel:
- Connection: Leave it as Zoho Campaigns or authenticate if needed.
- Variable Name: Keep the default.
- Portal: Zoho automatically fills this.
- Workspace: Also auto-filled.
- List: Choose the mailing list you want, such as Contacts CRM.
- Email addresses
This field must be mapped.

How to map it:
- Click inside the Email addresses field.
- On the right side of the screen, under New module entry – Zoho CRM, find the field Email.
- Click it to insert it into the field.
- Click Done, and your canvas will update to show the Zoho CRM trigger at the top with the Zoho Campaigns “Add contact to list” action directly beneath it.
Step 6: Test the Flow
- At the top right, click Test or Test & Debug.
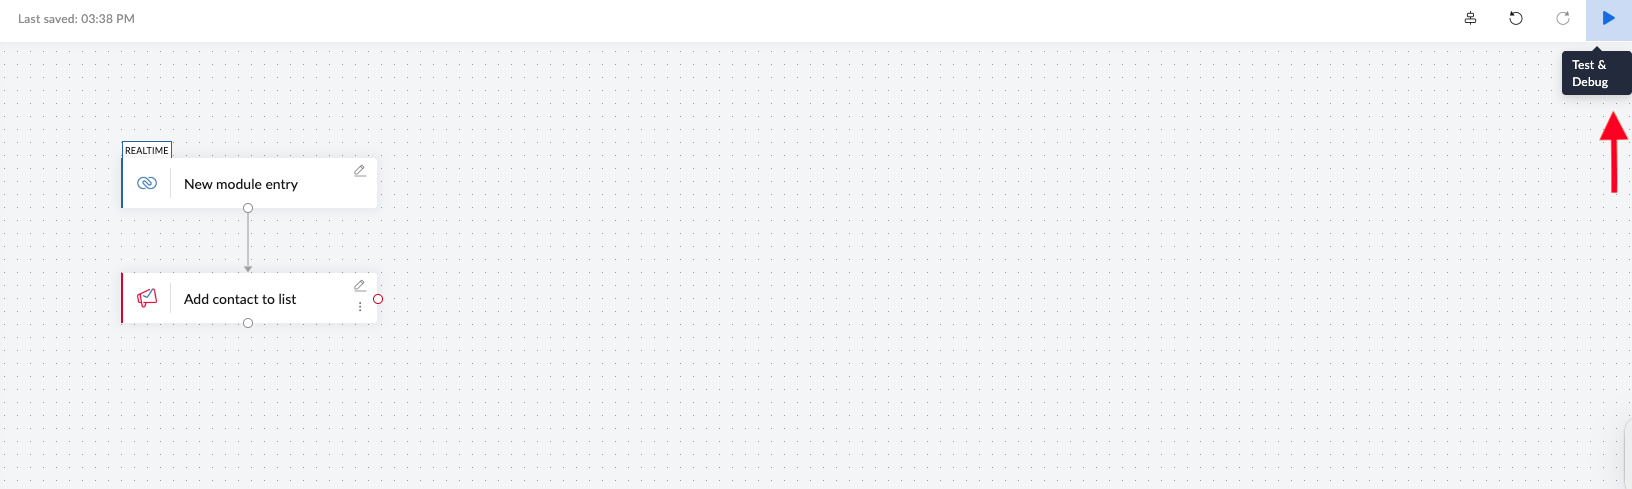
- Zoho Flow will display Waiting for trigger data.
- Open Zoho CRM in a new tab.
- Create a test lead with an email address.
- Save the lead.
- Return to Zoho Flow and look for the success message.
- The action should complete, and the test lead should appear in your Zoho Campaigns list.
Step 7: Turn the Flow ON
- In the top right corner, switch the Flow toggle from OFF to ON to activate your automation.
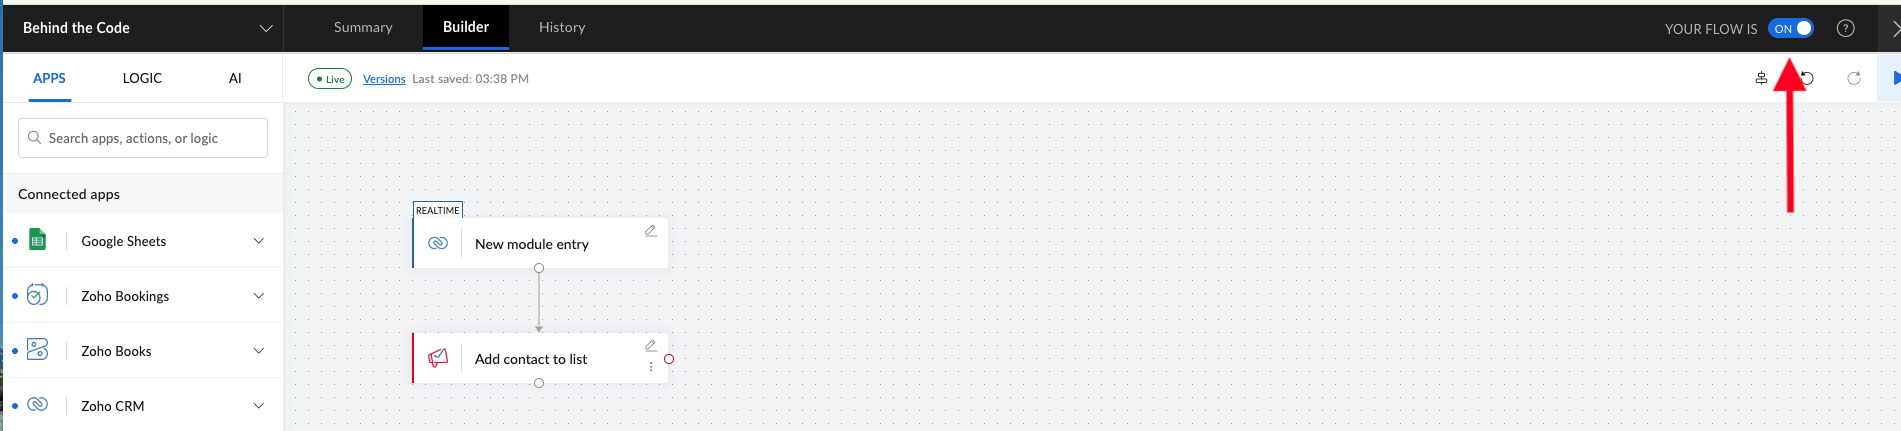
- Your automation is now active.